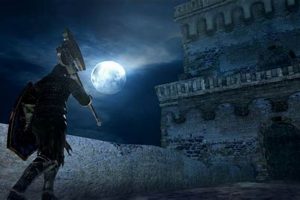
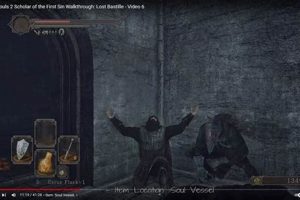
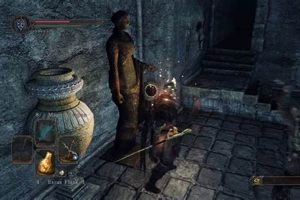
The Lost Bastille is a location in Dark Souls II, a challenging action role-playing game. It functions as a mid-game area accessible through multiple pathways, primarily from No-Man’s Wharf or Huntsman’s Copse. The area is characterized by its dilapidated fortress structure, inhabited by hollowed guards, powerful Ruin Sentinels, and aggressive dogs.
This location presents significant challenges to players due to its interconnected layout, numerous ambushes, and formidable enemy placements. Overcoming these obstacles is essential for game progression, as it houses key items and leads to further areas necessary to complete the game. The area’s design contributes to the game’s overall oppressive atmosphere and sense of isolation, fitting the established lore and themes of the Dark Souls series.
Understanding its intricate map, enemy behaviors, and hidden pathways is crucial for players aiming to navigate the fortress successfully. Strategies for dealing with common threats, exploration tactics to uncover secrets, and specific boss encounters within the area will be detailed in subsequent sections.
Effective navigation and enemy management are crucial for survival within the deteriorated walls. Careful planning and execution are required to overcome the challenges presented.
Tip 1: Observe Enemy Patrol Patterns: Prior to engaging, carefully observe the movement of enemies. Identifying patrol routes allows for strategic ambushes or avoidance where necessary. This minimizes the risk of being overwhelmed by groups.
Tip 2: Utilize Ranged Combat: The environment features numerous narrow corridors and elevated platforms. Exploiting ranged attacks provides a tactical advantage, allowing for the elimination of enemies before they can close the distance.
Tip 3: Manage Stamina Prudently: Combat requires precise timing and stamina management. Overextending attacks leaves characters vulnerable. Conserving stamina for critical maneuvers such as dodging and blocking is paramount.
Tip 4: Exercise Caution with Illusory Walls: Several concealed passages exist. Striking suspicious walls or examining unusual architectural features may reveal hidden areas containing valuable items or shortcuts.
Tip 5: Prioritize Eliminating Dogs: The agile canine enemies pose a significant threat due to their speed and tendency to attack in packs. Dispatching these creatures quickly reduces the overall level of danger.
Tip 6: Upgrade Weaponry: Adequate offensive capabilities are vital for efficient enemy elimination. Regularly upgrading weapons at the blacksmith significantly increases damage output, facilitating progress through the area.
Tip 7: Be Wary of Exploding Mummies: Several mummified enemies explode upon proximity or death. Maintain a safe distance when engaging these foes to avoid taking significant damage.
Mastering these strategies greatly increases the chances of successfully traversing the fortress and overcoming its challenges. Proper planning and execution are essential for survival.
By implementing these tactics, the journey through this location will become more manageable, leading to greater success in the overall game experience.
1. Fortress Architecture
The fortress architecture is inextricably linked to the overall design and challenge of the Lost Bastille in Dark Souls II. Its decaying structure, characterized by tight corridors, elevated battlements, and crumbling towers, directly impacts player navigation, combat encounters, and the overall sense of oppressive isolation. The architecture isn’t merely aesthetic; it’s a functional element that dictates how players approach each area. For instance, narrow passageways limit maneuverability, favoring enemies that utilize close-quarters combat, while strategically placed archers on ramparts force players to consider ranged options or risk being overwhelmed. The interconnectedness of the levels, often looping back on themselves, can lead to disorientation but also provides opportunities for ambushes and tactical retreats.
A prime example of this architectural influence can be seen in the battle against the Ruin Sentinels. This multi-stage boss fight takes place across a series of platforms connected by narrow bridges. The limited space forces players to be mindful of their positioning and stamina management, making it a significantly different challenge than if the encounter occurred in a more open arena. Furthermore, the presence of illusory walls and hidden pathways adds another layer to the architectural complexity, rewarding thorough exploration and observation. These architectural features not only contribute to the gameplay but also support the lore, suggesting a once-imposing structure now riddled with decay and secrets.
In summary, the fortress architecture is not simply a backdrop but an integral component of the game’s design, directly influencing player strategy, combat tactics, and the overall sense of foreboding that permeates the Lost Bastille. Understanding the nuances of its layout and interconnectedness is crucial for successfully navigating the area and overcoming its challenges. Ignoring the architectural design diminishes the player’s ability to anticipate threats, manage resources effectively, and ultimately, progress through the game.
2. Enemy Variety
The diverse range of adversaries within Dark Souls II‘s Lost Bastille is not merely an aesthetic choice; it is a fundamental component contributing directly to the area’s difficulty and overall design. The purposeful placement of specific enemy types influences player behavior, compelling adaptation and strategic resource allocation. The presence of hollowed soldiers, Ruin Sentinels, Royal Swordsmen, dogs, and exploding mummies, among others, necessitates a comprehensive understanding of each enemy’s attack patterns, weaknesses, and environmental interactions. Without recognizing and responding to these differences, progression through the area becomes significantly more challenging.
For example, the agile and aggressive dogs require a different approach than the heavily armored Royal Swordsmen. Ignoring the dogs’ speed and attempting to trade blows as one might with the swordsmen often results in swift defeat. Similarly, neglecting the exploding mummies’ self-destructive tendencies can lead to unexpected damage and a depletion of estus flasks, resources that are critical for survival. The boss encounters, particularly the Ruin Sentinels, are designed to test the player’s ability to adapt to multiple enemy types with distinct attack styles, forcing the utilization of different combat strategies and weapon types. Further, the strategic placement of ranged enemies atop towers necessitates efficient use of cover and/or ranged counters.
In conclusion, the enemy variety within the Lost Bastille is a deliberate design choice that serves to increase the area’s difficulty and demand adaptable gameplay. Success within the fortress is directly linked to the ability to identify, understand, and effectively counter each enemy type’s unique attributes. This understanding allows for optimized resource management, efficient combat strategies, and ultimately, successful progression through this challenging section of Dark Souls II.
3. Strategic Ambush
Strategic ambush is a core design principle implemented within the Lost Bastille, a key location in Dark Souls II. The environment is engineered to facilitate ambushes, often involving concealed enemies, obscured pathways, and strategically positioned ranged attackers. The impact of these ambushes is significant, designed to deplete player resources, create a sense of unease, and penalize careless exploration. Successful navigation necessitates heightened awareness and cautious progression.
The strategic placement of enemies is not random. Many are positioned behind corners, above doorways, or in dark recesses, waiting for unsuspecting players. This design forces a deliberate and methodical approach to exploration. For example, hollowed soldiers may lie in wait behind barricaded doors, while archers positioned on high towers cover key thoroughfares. Furthermore, some enemies, such as the exploding mummies, are designed as mobile ambush units, detonating upon proximity to deal significant damage. These combined tactics drastically impact player survivability.
The integration of strategic ambushes presents a fundamental challenge within the Lost Bastille. Overcoming these challenges requires a combination of observation, patience, and tactical awareness. Failure to recognize potential ambush points leads to resource depletion and increased vulnerability. Thus, understanding and mitigating the impact of strategic ambushes is paramount for successful navigation and progression through this challenging area of Dark Souls II.
4. Ruin Sentinels
The Ruin Sentinels represent a significant encounter within the Lost Bastille, a mid-game area of Dark Souls II. Their presence highlights the location’s difficulty and serves as a major obstacle for players progressing through the game.
- Boss Arena Design
The Ruin Sentinels are fought in an arena comprised of multiple platforms connected by narrow bridges. This environmental constraint directly influences combat strategy, forcing players to manage their positioning and stamina carefully. The limited space increases the challenge compared to fights in open areas.
- Multi-Enemy Combat
The encounter involves fighting three Ruin Sentinels sequentially, with the first Sentinel being engaged alone initially, followed by the simultaneous arrival of the remaining two. This multi-enemy dynamic tests the player’s ability to prioritize targets, control the battlefield, and manage multiple attack patterns simultaneously.
- Enemy Attack Patterns
The Sentinels employ a variety of attacks, including sweeping strikes, leaping attacks, and shield throws. Each attack requires a different defensive or evasive maneuver. Players must learn to recognize and react accordingly to avoid significant damage. The timing of dodges and blocks becomes crucial for survival.
- Lore Implications
The Ruin Sentinels are depicted as guardians, suggesting a role in protecting or imprisoning something within the Lost Bastille. Their presence contributes to the overall narrative, hinting at a history of confinement and punishment. Their stoic and relentless nature reinforces the area’s themes of isolation and despair.
These facets of the Ruin Sentinels are integral to the design of the Lost Bastille. Their presence as challenging guardians, combined with the arena’s design and their connection to the area’s lore, solidify the location’s reputation as a formidable obstacle in Dark Souls II. Overcoming the Ruin Sentinels is a key milestone in progressing through the game.
5. Multiple Pathways
The Lost Bastille in Dark Souls II is characterized by its interconnected design and the provision of multiple pathways to access and navigate the area. This design choice fundamentally influences player experience, offering flexibility in exploration and strategic planning. The availability of alternate routes mitigates potential roadblocks, allowing players to circumvent particularly challenging encounters or revisit previously explored areas from different vantage points. Access to the Lost Bastille can be achieved via No-Man’s Wharf or Huntsman’s Copse, establishing a level of non-linearity in the game’s progression.
The practical implications of these multiple pathways are considerable. Players struggling with a specific route can explore alternative options, potentially discovering valuable items or leveling up before returning to the initial challenge. This allows players to tailor their journey to their individual skill level and preferred playstyle. Furthermore, certain pathways may be more conducive to specific character builds, offering advantages to those who invest in particular stats or weapon types. For example, a ranged-focused character may find the upper battlements, accessed via one path, more advantageous than the close-quarters corridors found along another.
The presence of these alternative routes also enhances replayability. Subsequent playthroughs can benefit from the knowledge of multiple pathways, enabling players to optimize their route and discover previously unexplored areas. This element of choice adds depth to the game’s overall design, encouraging exploration and experimentation. While mastering one particular route may prove sufficient for initial completion, the full appreciation of the Lost Bastille’s design stems from understanding and utilizing its multiple interconnected pathways.
6. Imprisonment Lore
The lore of imprisonment is deeply interwoven into the architectural and environmental design of the Lost Bastille. This connection serves to amplify the area’s oppressive atmosphere and convey a history steeped in suffering and confinement. The Bastille functions not merely as a location within Dark Souls II, but as a tangible manifestation of societal control and the consequences of transgression. The presence of cells, shackles, and executioners tools visually communicates a narrative of punishment and restricted freedom. The geographical isolation of the Bastille, accessible only through specific pathways, reinforces its function as a place of forced isolation.
The environmental storytelling within the Lost Bastille provides contextual clues about the nature of the prisoners and the regime that incarcerated them. The presence of hollowed guards patrolling the dilapidated corridors suggests a decay of order and a descent into madness. The very structure of the fortress, designed for containment and control, speaks to a system of law and justice that has long since crumbled. The Ruin Sentinels, serving as formidable guardians, imply a deliberate effort to prevent escape, further reinforcing the themes of captivity and the futility of resistance. Certain item descriptions found within the area further elucidate the past, revealing details about the individuals who were imprisoned and the crimes they may have committed. The prevalence of the Undead Curse likely played a significant role, with the Bastille perhaps serving as a final destination for those afflicted.
Understanding the lore of imprisonment enhances the players appreciation of the Lost Bastille beyond its mechanical challenges. It transforms the area from a collection of enemies and obstacles into a place with a history and a purpose, adding depth to the overall narrative of Dark Souls II. This understanding also encourages a more cautious and thoughtful approach to exploration, as players are compelled to consider the significance of each environment detail. The challenges associated with the Bastille navigating treacherous pathways, overcoming powerful guardians, and avoiding strategic ambushes become more meaningful when viewed through the lens of its dark history. The Bastille is not simply a test of skill; it is a reminder of the cost of freedom and the enduring legacy of oppression.
Frequently Asked Questions
This section addresses common inquiries regarding a mid-game area in Dark Souls II. The information provided aims to clarify specific aspects of the location and its associated challenges.
Question 1: What is the recommended level for entering this location?
While there is no prescribed level, a character level between 50 and 70 is generally recommended. This range provides sufficient attributes and upgraded equipment to withstand the encountered enemies and environmental hazards. However, skilled players may attempt the area at lower levels.
Question 2: How many bonfires exist within the Lost Bastille?
There are four discoverable bonfires, each strategically placed to provide respite and serve as respawn points. Discovering all bonfires is beneficial for efficient traversal and recovery. Note that lighting all bonfires does not guarantee ease of completion, as skill and resource management remain crucial.
Question 3: What are the primary methods of accessing the Lost Bastille?
Two main pathways lead to the fortress: one through No-Man’s Wharf, requiring the use of a ship, and another via Huntsman’s Copse and the Ruined Fork Road. The chosen path can influence the initial challenges encountered.
Question 4: Is it possible to skip the Ruin Sentinels boss fight?
No, the Ruin Sentinels are a mandatory encounter. Their defeat is required to obtain the Bastille Key, necessary for further progression. Attempting to circumvent this encounter will impede advancement in the game.
Question 5: Are there any optional areas within the Lost Bastille?
Yes, several optional areas exist, including the Belfry Luna. Exploration of these areas is not mandatory for completing the main storyline, but can yield valuable items, spells, and equipment.
Question 6: What types of damage are the enemies most vulnerable to in the location?
Many enemies exhibit vulnerabilities to lightning damage. Equipping weapons or utilizing spells with lightning properties can prove advantageous in combat. However, reliance solely on one damage type is not recommended, as some enemies possess higher resistances.
The preceding questions and answers provide a general overview. Further exploration and experimentation are encouraged for a complete understanding of the challenges.
The next section will address strategies for effectively dealing with the most formidable foes.
The Enduring Challenge of the Lost Bastille
This examination has detailed multiple facets of the location within Dark Souls II. From its architectural design and diverse enemy population to its strategic ambush points, the Ruin Sentinels boss encounter, multiple pathways, and its deep, imprisonment-themed lore, each aspect contributes to its overall difficulty. The information provided herein seeks to arm players with the knowledge necessary to navigate its treacherous corridors, overcome its formidable guardians, and ultimately, succeed in their endeavors.
The enduring challenge, therefore, extends beyond the mere memorization of enemy attack patterns or the acquisition of optimal equipment. Instead, it requires a commitment to careful observation, strategic planning, and a willingness to adapt to the ever-present threats that permeate this location. The Lost Bastille, within Dark Souls II, stands as a testament to the enduring legacy of difficulty, and the commitment to overcoming these challenging tests.


![[Guide] Dark Souls 2: Lost Bastille Boss Strategies + Tips! Hubbastille: Explore the Fusion of Culture, Music & Creativity [Guide] Dark Souls 2: Lost Bastille Boss Strategies + Tips! | Hubbastille: Explore the Fusion of Culture, Music & Creativity](https://hubbastille.com/wp-content/uploads/2025/09/th-587-300x200.jpg)
![Lost Bastille Boss Fight: Tactics & Weaknesses [Guide] Hubbastille: Explore the Fusion of Culture, Music & Creativity Lost Bastille Boss Fight: Tactics & Weaknesses [Guide] | Hubbastille: Explore the Fusion of Culture, Music & Creativity](https://hubbastille.com/wp-content/uploads/2025/09/th-566-300x200.jpg)